Bentonite for High Pressure Casting Lines: Proven Tips for Stronger Molds
Bentonite Basics: What It Is and Why It’s the Heart of Green Sand Moulding Key Components of a Green Sand Mix: Sand, Clay, and Bentonite Ratios Explained
Silica Sand – The Structural Backbone Clay Binder – The Glue That Holds the Grains Together Bentonite – The Super‑Binder for High‑Pressure Environments
Finding the Right Ratio – A Step‑by‑Step Approach Balancing Strength and Permeability Transition to the Next Topic
How Bentonite Affects Mold Strength, Permeability, and Surface Finish Step‑by‑Step Guide: Preparing and Using Bentonite‑Rich Green Sand for Castings
- Gather Materials and Equipment 2. Establish the Correct Ratios 3. Pre‑Moisten the Bentonite 4. Load the Mixer 5. Mix to Homogeneity 6. Test Mold Strength 7. Store the Mix Properly 8. Prepare the Mold 9. Transition to the Next Phase
Optimizing Bentonite Performance: Temperature Control, Additives, and Reconditioning Techniques Common Mistakes with Bentonite and How to Troubleshoot for Perfect Castings
Bentonite Basics: What It Is and Why It’s the Heart of Green Sand Moulding
Bentonite is a natural clay mineral composed chiefly of montmorillonite flakes. When mixed with water, those microscopic plates swell and create a thixotropic gel that can bind sand particles together. This unique ability makes bentonite the linchpin of green‑sand moulds, where the term “green†simply means the sand is uncured rather than literally fresh.
In practice, the bentonite‑water mixture behaves like a microscopic glue. The swollen clay sheets coat each grain of silica sand, forming a continuous film that locks the grains in place while still allowing the mould to be packed and released. This dual nature—strong enough to hold a casting under pressure yet pliable enough to be rapped apart—sets bentonite apart from other binders such as oil‑based clays or synthetic polymers.
A common misconception is that any clay will work for green sand. Bentonite’s high cation‑exchange capacity gives it superior water absorption, which translates to higher compressive strength. For example, a typical green‑sand mix containing 4–6 % bentonite by weight can achieve a tensile strength of 0.2 MPa, whereas a comparable mix with a generic clay often falls short of 0.1 MPa. The difference may seem modest, but in high‑pressure casting lines it can be the deciding factor between a defect‑free part and a cracked mould.
Why does this matter for modern foundries? As casting pressures climb to meet tighter tolerances, the mould must resist deformation without sacrificing permeability. Bentonite’s layered structure creates a network of micro‑pores that let gases escape while still holding the sand matrix firm. This balance reduces the risk of gas‑related defects such as blisters or sand inclusions, which are costly to rework.
Transitioning from theory to application, the typical preparation workflow begins with measuring the dry bentonite, hydrating it in a separate paddle, and allowing it to swell for 15–30 minutes. The swollen slurry is then blended into the bulk sand, often in a tumble mixer, to ensure even coating. Because bentonite’s effectiveness relies on proper hydration, skipping the swelling step can dramatically weaken the mould, leading to premature collapse under load.
Beyond strength, bentonite influences surface finish. Its fine particle size (often less than 2 µm) fills the interstices between larger sand grains, creating a smoother cavity wall. When the molten metal solidifies, this smoother surface translates to fewer machining passes and better dimensional accuracy. In environments where post‑casting machining time drives cost, the modest increase in bentonite dosage can yield a noticeable return on investment.
It’s also worth noting that bentonite is environmentally benign. The mineral is abundant, non‑toxic, and fully recyclable within the sand reclamation loop. After a casting cycle, the used sand can be reclaimed, the bentonite re‑hydrated, and the mixture returned to service with minimal waste. This sustainability angle aligns with today’s push toward greener manufacturing practices.
In summary, bentonite’s swelling capacity, high tensile strength, and fine particle distribution make it indispensable for green‑sand moulds, especially on high‑pressure casting lines. Its role extends beyond merely “gluing†sand; it underpins the mould’s ability to withstand pressure, release gases, and deliver a smooth surface—all while supporting recyclable, low‑impact operations. The next section will explore how sand, clay, and bentonite ratios interact to fine‑tune these properties for optimal casting performance.
Key Components of a Green Sand Mix: Sand, Clay, and Bentonite Ratios Explained
The green sand mixture that supports high‑pressure casting lines is built on three core ingredients: silica sand, clay binder, and bentonite. Each plays a distinct role, and the balance among them determines mold strength, permeability, and the ability to capture fine detail. Understanding how these components interact helps foundries fine‑tune their mixes for consistent, defect‑free castings.
Silica Sand – The Structural Backbone
Silica sand provides the bulk of the mold’s volume and the primary load‑bearing framework. In practice, most foundries select sand with a grain‑size distribution that falls between 0.1 mm and 1 mm. Coarser grains improve draft and thermal shock resistance, while finer grains fill voids and enhance surface finish. A common starting point is a sand that meets the “A‑type†specification for casting, offering a crush resistance of roughly 16 MPa and a moisture content below 3 %.
If the sand is too coarse, the mold may become overly porous, allowing excessive gas to escape and creating a rough surface. Conversely, overly fine sand can trap moisture, raise the heat‑transfer coefficient, and cause premature mold collapse under pressure. Striking a balance is therefore essential, and many experienced foundry engineers adjust the sand size distribution based on the geometry of the part being produced.
Clay Binder – The Glue That Holds the Grains Together
Traditional green sand mixes rely on a clay binder, most often kaolin or ball clay, to give the sand particles cohesion. The clay contributes roughly 5–10 % of the total mix by weight. Its plate‑like particles interlock with the sand, forming a flexible matrix that tolerates the high stresses of pressure casting.
In a typical formulation, the clay is pre‑moistened with a small amount of water before being blended with the sand. This step ensures the binder spreads evenly, preventing localized weak spots. The water content of the overall mix is usually kept between 4 % and 6 % of the dry weight. Too much water can fluidize the sand, reducing its load‑bearing capacity, while too little water leaves the binder ineffective, leading to sand erosion and surface chatter.
Bentonite – The Super‑Binder for High‑Pressure Environments
Bentonite, a smectite‑rich clay, is the star of modern high‑pressure green sand systems. Its natural swelling ability—triggered when it contacts water—creates a gel that locks sand grains together far more tightly than ordinary clay. Because of this, bentonite can replace a portion of the traditional clay binder while still delivering superior strength.
A typical bentonite contribution ranges from 2 % to 6 % of the dry mix weight. When a foundry aims for exceptionally high molding pressures (often above 30 MPa), the higher end of that range is common. Below that threshold, a lower bentonite level may be sufficient, allowing more sand to remain in the mix for better permeability.
Practical tip:
Measure bentonite by weight, not volume, because its low bulk density can lead to under‑estimation if scooped.
Finding the Right Ratio – A Step‑by‑Step Approach
Start with a base sand‑to‑clay ratio of 90 % sand to 10 % clay (by weight). Add bentonite at 4 % of the dry weight. This is a mid‑range value that works for most medium‑pressure applications. Adjust water content gradually, aiming for a total moisture level of 5 % of the dry mix. Use a moisture meter or the “hand test†(a handful of sand should form a loose ball without crumbling). Test mold strength by compacting a sample in a standard tamping device. If the compressive strength falls short of the required pressure, increase bentonite by 1 % increments, re‑mix, and retest. Check permeability by measuring the rate at which air passes through a cured sample. If the rate is too low, reduce the bentonite percentage or add a small amount of fine sand to open up the pore network.
Balancing Strength and Permeability
The central challenge in any green sand formulation is reconciling two opposing goals: high strength for pressure resistance, and sufficient permeability to vent gases. Bentonite excels at strength but can diminish permeability if over‑used. Most foundries therefore adopt a “sweet spot†where bentonite provides enough gel to hold the sand under pressure while still leaving a network of interstitial spaces for gas flow.
A practical rule of thumb is to keep bentonite at 4 % or less when casting thin‑walled parts that require rapid gas evacuation. For thick sections or heavy‑weight components, raising bentonite to 5–6 % usually yields the needed robustness without compromising surface quality.
Transition to the Next Topic
Having established how sand, clay, and bentonite combine to form a balanced green sand mix, the next step is to explore how those ratios directly influence mold strength, permeability, and surface finish. Understanding these effects will enable foundry teams to predict performance before the first pour and make data‑driven adjustments to their formulations.
How Bentonite Affects Mold Strength, Permeability, and Surface Finish
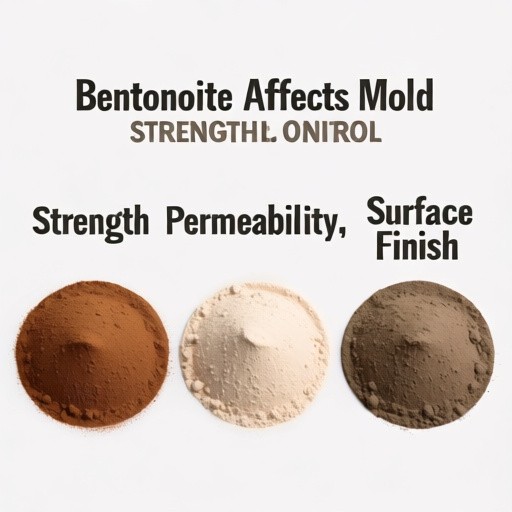
Bentonite’s primary role in a green‑sand mix is to act as a binding agent, but its influence extends far beyond simple cohesion. When the fine, plate‑like particles of bentonite hydrate, they create a lattice of interlocking sheets that dramatically increases the sand’s tensile and compressive strength. In practice, this means a mold that can withstand the high pressures of modern casting lines without cracking or shifting. The result is a more reliable cavity geometry and a lower risk of flash—those unwanted projections that appear when the metal forces its way past a weak spot in the sand.
A common misconception is that adding more bentonite automatically yields a stronger mold. While higher bentonite percentages do raise strength, they also thicken the sand matrix, which can impede gas escape. Permeability—the ability of the mold to let air and gases flow out as the metal solidifies—is a balancing act. If the sand becomes too dense, trapped gases create porosity or even lead to defects such as sand blowouts. Skilled foundry operators therefore monitor the permeability index (often measured in cm³/s) while adjusting bentonite levels. The key is to reach a sweet spot where the mold is solid enough to hold shape yet porous enough to evacuate gases efficiently.
Surface finish is another area where bentonite makes a noticeable difference. The fine clay particles fill micro‑voids on the sand grains, creating a smoother cavity wall. When metal contacts this refined surface, it reproduces the texture more faithfully, resulting in castings with reduced roughness and fewer machining passes. In addition, the water retained in the bentonite film acts as a slight lubricant, allowing the molten metal to spread evenly across the mold. However, excessive moisture can cause a “wet sand†condition, where the surface becomes gummy and adheres to the metal, leading to casting defects like metal sticking or surface tearing.
To illustrate the trade‑offs, consider a typical high‑pressure casting line that operates at 12 MPa. A mix with 8 % bentonite by weight might deliver a compressive strength of roughly 2 MPa, comfortably holding the pressure while maintaining a permeability of 25 cm³/s. Raising the bentonite to 12 % could boost strength to 2.8 MPa, but permeability may drop below 15 cm³/s, increasing the chance of gas‑related flaws. Operators often compensate by adjusting the grain‑size distribution (adding a small proportion of finer sand) or by introducing a venting agent to preserve flow paths.
Practical tips for fine‑tuning the three properties include:
Gradual adjustments: Increase bentonite in 0.5 % increments, measuring strength and permeability after each change. Moisture control: Keep water content just enough to activate the bentonite (usually 0.4–0.6 kg water per kg of dry mix). Too much water softens the lattice; too little leaves it brittle. Additive synergy: Incorporate a small amount of organic binder (e.g., lignosulfonate) to improve surface finish without sacrificing permeability. Compaction technique: Use a consistent ram pressure; uneven compaction can mask the true effect of bentonite on strength.
Transitioning from these principles to hands‑on preparation is straightforward. The upcoming section will walk through a step‑by‑step procedure for mixing, testing, and applying a bentonite‑rich green sand blend, ensuring that the theoretical benefits discussed here translate into reliable, high‑quality castings.
Step‑by‑Step Guide: Preparing and Using Bentonite‑Rich Green Sand for Castings
Bentonite‑rich green sand is the cornerstone of reliable high‑pressure casting lines. After learning how bentonite influences mold strength, permeability, and surface finish, the next logical step is to turn that knowledge into a repeatable process. The following guide walks a shop floor operator from raw material handling to a ready‑to‑use sand mix, emphasizing safety, consistency, and minimal waste.
1. Gather Materials and Equipment
Dry sand – a well‑graded silica sand with a particle size distribution that matches the casting design. Bentonite powder – typically a sodium‑type bentonite because of its rapid swelling characteristics. Water – clean, room‑temperature water; temperature spikes can cause uneven hydration. Mixing equipment – a twin‑shaft sand mixer or a high‑capacity drum with a built‑in agitator. Measuring tools – calibrated scales for sand and bentonite, and a flow‑meter for water.
Having everything on hand before the first turn of the mixer reduces run‑time interruptions and helps maintain the targeted mix ratios.
2. Establish the Correct Ratios
The classic green sand recipe calls for approximately 10 % bentonite by weight of the dry sand, with 4–5 % water relative to the combined weight of sand and bentonite. These proportions can be adjusted slightly based on the sand’s grain shape or the required mold strength, but they provide a solid starting point for most high‑pressure applications.
Tip: Keep a small log of the exact weights used for each batch. Over time, subtle trends emerge that can be used to fine‑tune the formula for a particular alloy or casting geometry.
3. Pre‑Moisten the Bentonite
Bentonite does not dissolve instantly; it must hydrate fully to develop its plasticity. Place the measured bentonite in a clean container, add about half of the total water, and stir gently for 2–3 minutes. The mixture should become a smooth, lump‑free slurry. This pre‑hydration step prevents hard clumps from forming later in the mixer.
4. Load the Mixer
Add dry sand first. Pour the sand into the mixer while it is still stationary; this avoids a sudden splash of dust. Introduce the bentonite slurry. Slowly pour the hydrated bentonite while the mixer begins to turn at low speed. Add the remaining water. Continue the low‑speed rotation as the rest of the water is introduced.
Starting the mixer at a low speed ensures that the bentonite coats each sand grain evenly before the mixture becomes too thick to move.
5. Mix to Homogeneity
Increase the mixer speed to medium‑high and run the cycle for 5–7 minutes. During this period, observe the visual cues:
The sand should change from dry granules to a cohesive, slightly damp mass. A slight sheen on the surface indicates uniform water distribution. No visible dry patches or large clumps should remain.
If the mix feels too dry, sprinkle a few milliliters of water and continue mixing for another minute. Conversely, if it feels overly sticky, a short burst of dry sand can restore balance.
6. Test Mold Strength
Before committing the batch to production, perform a quick hand‑compaction test:
Fill a small metal test block with the sand, tamp it firmly, and then attempt to pull it apart. The sand should resist cracking and hold its shape, indicating adequate green strength.
If the test block crumbles, return the mixer to low speed, add a modest amount of bentonite (no more than 1 % of the original sand weight), and remix. This fine‑tuning avoids costly rework later in the casting line.
7. Store the Mix Properly
When the sand is ready, transfer it to a covered storage bin located near the molding station. Keep the bin sealed to prevent moisture loss, which can reduce plasticity. For continuous operations, a re‑circulating system that feeds sand back into the mixer at regular intervals helps maintain consistent moisture content.
8. Prepare the Mold
With the green sand on hand, follow the standard molding procedure:
Rough packing – loosely fill the cope and drag cavities. Final packing – use a tamping ram to achieve the target green strength. Ventilation – open the sand vent to allow gases from the molten metal to escape, preserving surface finish.
The careful preparation of sand at this stage directly influences casting quality, especially when dealing with high‑pressure injection where mold deformation can be a hidden source of defects.
9. Transition to the Next Phase
Once the molds are packed, the casting line moves to the temperature control and additive optimization stage. Maintaining the sand’s moisture and bentonite activity during this period is vital, and the upcoming section on “Optimizing Bentonite Performance†will detail how to keep the mix at its peak performance.
Optimizing Bentonite Performance: Temperature Control, Additives, and Reconditioning Techniques

When the sand‑mix leaves the preparation bin and heads toward the molding line, subtle factors begin to dominate its behavior. Temperature, supplemental chemicals, and the way the mixture isrefreshed can each shift bentonite from a reliable binder to a source of defect. Understanding how these elements interact lets the foundry maintain consistent strength while avoiding costly re‑work.
Temperature matters more than most operators realize. Bentonite’s swelling capacity—its ability to absorb water and develop a gel—peaks around 20 °C to 25 °C (68 °F to 77 °F). Below this range, the clay contracts, leaving gaps that reduce tensile strength. Above it, the gel can become overly fluid, causing the sand to slump and the mold surface to lose definition. In practice, many high‑pressure lines install a simple ambient‑temperature sensor on the sand‑storage hopper. When the reading drifts more than five degrees from the target, a low‑energy heater or a vented blower is automatically engaged. This closed‑loop approach keeps the mix within the optimal window without manual intervention.
Temperature control also influences moisture retention. Warmer sand evaporates water faster, demanding more frequent water additions. A practical rule of thumb is to measure the sand’s moisture content after each 30‑minute production run; if the loss exceeds 0.5 % by weight, a fine mist of water can be sprayed to restore balance. Conversely, in cooler climates the sand may hold excess moisture, so operators often spread a thin layer of dry sand across the top of the bin to encourage uniform drying.
Beyond temperature, additives serve as performance enhancers. The most common supplement is a small amount of sodium carbonate (soda ash). When introduced at 0.2 % to 0.5 % of the dry sand weight, it raises the pH of the bentonite slurry, reducing the tendency of clay particles to flocculate. The result is a more stable gel that resists cracking during the high‑pressure squeeze. Another frequently used additive is a surfactant, such as a non‑ionic polymer, added at 0.1 % to improve the sand’s permeability without sacrificing strength. Operators should add these chemicals after the sand has reached the target temperature, mixing them in a separate water tank before blending with the main slurry.
A short bullet checklist helps keep additive usage on track:
Soda ash – 0.2 %–0.5 % of dry sand; raises pH, improves gel stability. Surfactant polymer – 0.1 % of dry sand; boosts permeability. Organic binders (e.g., starch) – up to 0.3 %; can increase surface finish quality in low‑pressure runs. Deflocculants – used sparingly; prevent excessive thickening when water content is high.
When the mix has been in circulation for several hours, reconditioning becomes essential. Over time, the bentonite particles can become over‑worked, leading to a loss of swelling ability. A typical reconditioning cycle starts by removing a portion of the used sand—usually 10 % to 15 % of the total volume—and replacing it with fresh, dry sand. The fresh sand is pre‑moistened to the same water‑to‑bentonite ratio, then blended back into the bin. This “partial refresh†restores the overall binder capacity while keeping material waste low.
For foundries that run continuously, a more automated approach is common. A conveyor system periodically siphons sand from the bottom of the storage bin, filters out larger clumps, and returns the cleaned material to the top. The filtered sand is then mixed with a measured charge of fresh bentonite and water, maintaining a constant composition. Monitoring the returned sand’s moisture content ensures that the reconditioning step does not introduce excess water, which could otherwise lead to swelling defects later in the molding process.
In summary, temperature control, judicious additive use, and systematic reconditioning together create a resilient bentonite‑rich sand. By treating these variables as interconnected levers rather than isolated tasks, the foundry can keep mold strength high, surface finish smooth, and production downtime low. The next section will explore the typical mistakes that arise when any of these levers are mis‑managed and how to troubleshoot them effectively.
Common Mistakes with Bentonite and How to Troubleshoot for Perfect Castings
A frequent source of frustration on high‑pressure casting lines is simple, avoidable errors in handling bentonite. Even seasoned operators can fall into these traps, leading to weak molds, surface defects, or costly downtime. Below is a practical look at the most common missteps and the steps needed to correct them.
- Over‑ or under‑watering the sand mix When water content drifts even a few percent from the target, the bentonite cannot develop its full colloidal network. Too much water creates a slurry that drains during the pour, leaving voids; too little water prevents the clay particles from swelling, reducing cohesion.
Troubleshooting: Measure moisture with a calibrated sand‑moisture tester before each batch. Adjust the water feed in 0.5 % increments, mix thoroughly, and re‑test until the desired moisture is reached.
- Ignoring the impact of temperature spikes Bentonite’s swelling ability decreases sharply above 60 °C (140 °F). In a hot shop, the sand can reach this threshold during prolonged runs, especially if the furnace exhaust is poorly vented.
Troubleshooting: Install a simple infrared thermometer at the sand storage bin. If temperatures exceed 55 °C, introduce a cooling loop—such as a spray of fine mist or a forced‑air system—until the mix returns to the optimal range.
- Using an incorrect sand‑to‑clay ratio A common shortcut is to cut the bentonite proportion to save material cost. Reducing the clay from the recommended 4–5 % of the sand weight often looks harmless, yet the resulting mold loses tensile strength dramatically.
Troubleshoot: Perform a quick “hand‑tap†test. Compact a small sample of the mix in the palm and tap it with a fingernail; a healthy mix will produce a clear, resonant sound. If the sound is dull, the clay ratio is likely too low. Return to the specified proportion and re‑mix.
- Skipping re‑conditioning after multiple pours Bentonite degrades over time as it absorbs moisture and fine particles. Operators sometimes assume that a single mixing cycle is sufficient for a whole shift, leading to a gradual decline in mold quality.
Troubleshooting: Schedule a re‑conditioning cycle after every 8–10 pours. This involves adding fresh bentonite, a small amount of water, and a brief high‑speed mixing period. The refreshed slurry restores the sand’s binding capacity and improves surface finish.
- Failing to filter out foreign debris Small stones, metal chips, or hardened sand clumps can act as stress concentrators. When these contaminants are introduced into the green sand, the bentonite cannot surround them, creating weak points that crack under pressure.
Troubleshoot: Employ a vibrating screen before the sand enters the mixing drum. A quick visual inspection of the screened material can catch large foreign objects that might otherwise slip through.
- Inconsistent mixing time and speed Both under‑mixing and over‑mixing are harmful. A brief mix leaves the bentonite unevenly dispersed; an excessively long high‑speed mix can break down the clay platelets, reducing their ability to bond.
Solution: Follow the manufacturer’s recommended mixing time—typically 2–3 minutes at medium speed. Use a timer on the mixing console and observe the sand’s texture; it should feel uniformly damp and free of dry patches.
- Neglecting proper storage of bentonite powder Bentonite absorbs moisture from the air, forming lumps that dissolve unevenly when added to the sand. Storing the powder in a sealed container with a desiccant prevents this issue.
Remedy: Check the powder’s bulk density before each use. If it appears clumped, run it through a fine‑mesh sieve to break up aggregates, then add the reclaimed powder to the mix.
These pitfalls illustrate how small oversights can cascade into major production problems. By instituting routine checks—moisture testing, temperature monitoring, ratio verification, and periodic re‑conditioning—operators can keep the bentonite performing at its peak. The next section will explore how to fine‑tune cast‑out pressure and venting to further enhance mold integrity.